post

Mixed nuts & fruits cake

Maybe I’m more of a feverent cook than a baker but it’s been a while since I last posted a cake recipe. It’s been the Parkin cake, back in November 2018! I prepared this cake for an epic Christmas Party at a friends place, and oh boy! Not wanting to toot my own horn but I actually surprised myself that day. It was delicious and went down well with the mulled wine.

Wanting to get better at baking I need to embrace the challenge and this cake recpice is one of the first culinary challenges in 2019. I love nuts and I love mixed fruits and berries so this cake may be another winner. Let’s get to it!

Ingredients

  • 150g dates
  • 100g ground almonds
  • 100g ground walnuts
  • 150g spelt flour
  • 100g vegan butter or margarine
  • 50g sliced almonds
  • 800g silken tofu (organic)
  • 400g tofu (organic)
  • 1 scraped out vanilla bean or 3 tsp vanilla extract
  • 8g vanilla sugar
  • 150g coconut sugar (alternatively any other sugar)
  • juice and peel of 2 lemons
  • 3 tsp baking powder
  • 1 pack of Dr. Oetger instant vanilla pudding powder
  • 250g mixed fruit such as mixed berries, red currant, black currant , strawberries, mango etc

Preparation

  1. Chop the dates roughly and let them soak in water over night.
  2. The next day, drain the water off and purree the dates in a food processor.
  3. Mix the date purree with the ground nuts, the flour, and the vegan butter /margarine until you get a smooth dough.
  4. Dry roast the sliced almonds in a pan until golden and set aside.
  5. Grease a round non-stick springform cake tin (Diameter 24-26cm) and distribute the dough evenly in it, covering the bottom and the sides.
  6. Mix the silken tofu, the tofu, the vanilla sugar, vanilla bean contents, lemon juice and peel, coconut sugar, baking powder, and Dr. Oetger instant vanilla pudding powder together, and blend well/combine all ingredients in a food processor.
  7. Now add the mixed fruit and gently fold them into the tofu mix.
  8. Pour the tofu-fruit mixture into the dough covered cake tin, and sprinkle roasted almonds on top.
  9. Bake in the oven at 180°C for about 60-70 minutes.
  10. Remove the cake from the oven and let the cake cool down in the cake tin until the tofu-fruit mixture firms up enough to open and remove the springform.
Mixed nuts & fruits cake
post

Kale and red cabbage salad with butternut squash

For all of you who have been following my plant-based recipes for some time, you know that I’m always seeking unique colour, flavour, and texture combinations, rather than opting for the classical. Especially for salads that holds true. To not post the hundredth vegan red cabbage and carrot slaw recipe I was foodling a while, and found this yummy recipe, which I can perfectly picture with all its’ beautiful colours and textures.

I still got some left over red cabbage in the fridge, I’ve got some fresh kale, and bought a butternut squash today – so guess what is on the menu for me next?

Ingredients for 4-6

  • 500g fresh kale
  • 500g red cabbage, finely sliced
  • 2 cups butternut squash, cubed
  • ¾ cup walnuts, roughly chopped
  • 4-6 Tbsp pomegrante seeds
  • 4 Tbsp Tahini
  • 1 Tbsp red wine vinegar
  • 2 Tbsp lemon juice + some more for the kale “massage” 😉
  • 1 Tbsp orange juice
  • 1 Tbsp mustard
  • freshly grated orange peel
  • salt to taste
  • optional: ½ bis 1 tsp allspice

Preparation

For the salad:

  1. Peel and chop somebutternut squash into bitesize cubes of roughly the same size, so the pieces cook evenly.
  2. Either cook, steam or bake the squash cubes in an oven until tender/softened.
  3. In the meantime finely slice the red cabbage and set aside.
  4. Now, finely chip the kale (including the stem!) and place in a bowl. Drizzle some lemon juice over the kale and “massage” the leaves until they soften a bit.

For the dressing:

  1. Place the Tahini, the red wine vinegar, lemon and orange juice, mustard, orange peel, and salt into a small mason jar and place on the lid. Shake vigorously to mix all ingredients. If it’s too thick, add some water and repeat until you have the desired consistency. It should be creamy though, not runny.
  2. Optional: once you have reached the desired consistency, you may want to add the all spice for an additional flavour kick. Shake the mix again shortly.

All together now!

  1. Now mix the red cabbage with the kale in large salad bowl, and pour the dressing over. Mix well until the cabbage and kale are evenly covered with dressing.
  2. Place the mix on serving plates and garnish with the squash cubes, the walnuts, and the pomegrenate seeds.

For more plant-based inspirations please leave us your details below, and we’ll inform you via email when we upload new recipes to our website!

[wpforms id=”651″]

How is your Veganuary going so far? Are you enjoying the new plant-based colourful nutrition or do you find it challenging to embrace new textures and flavours? Please share your experience in the comments below 🙂

post

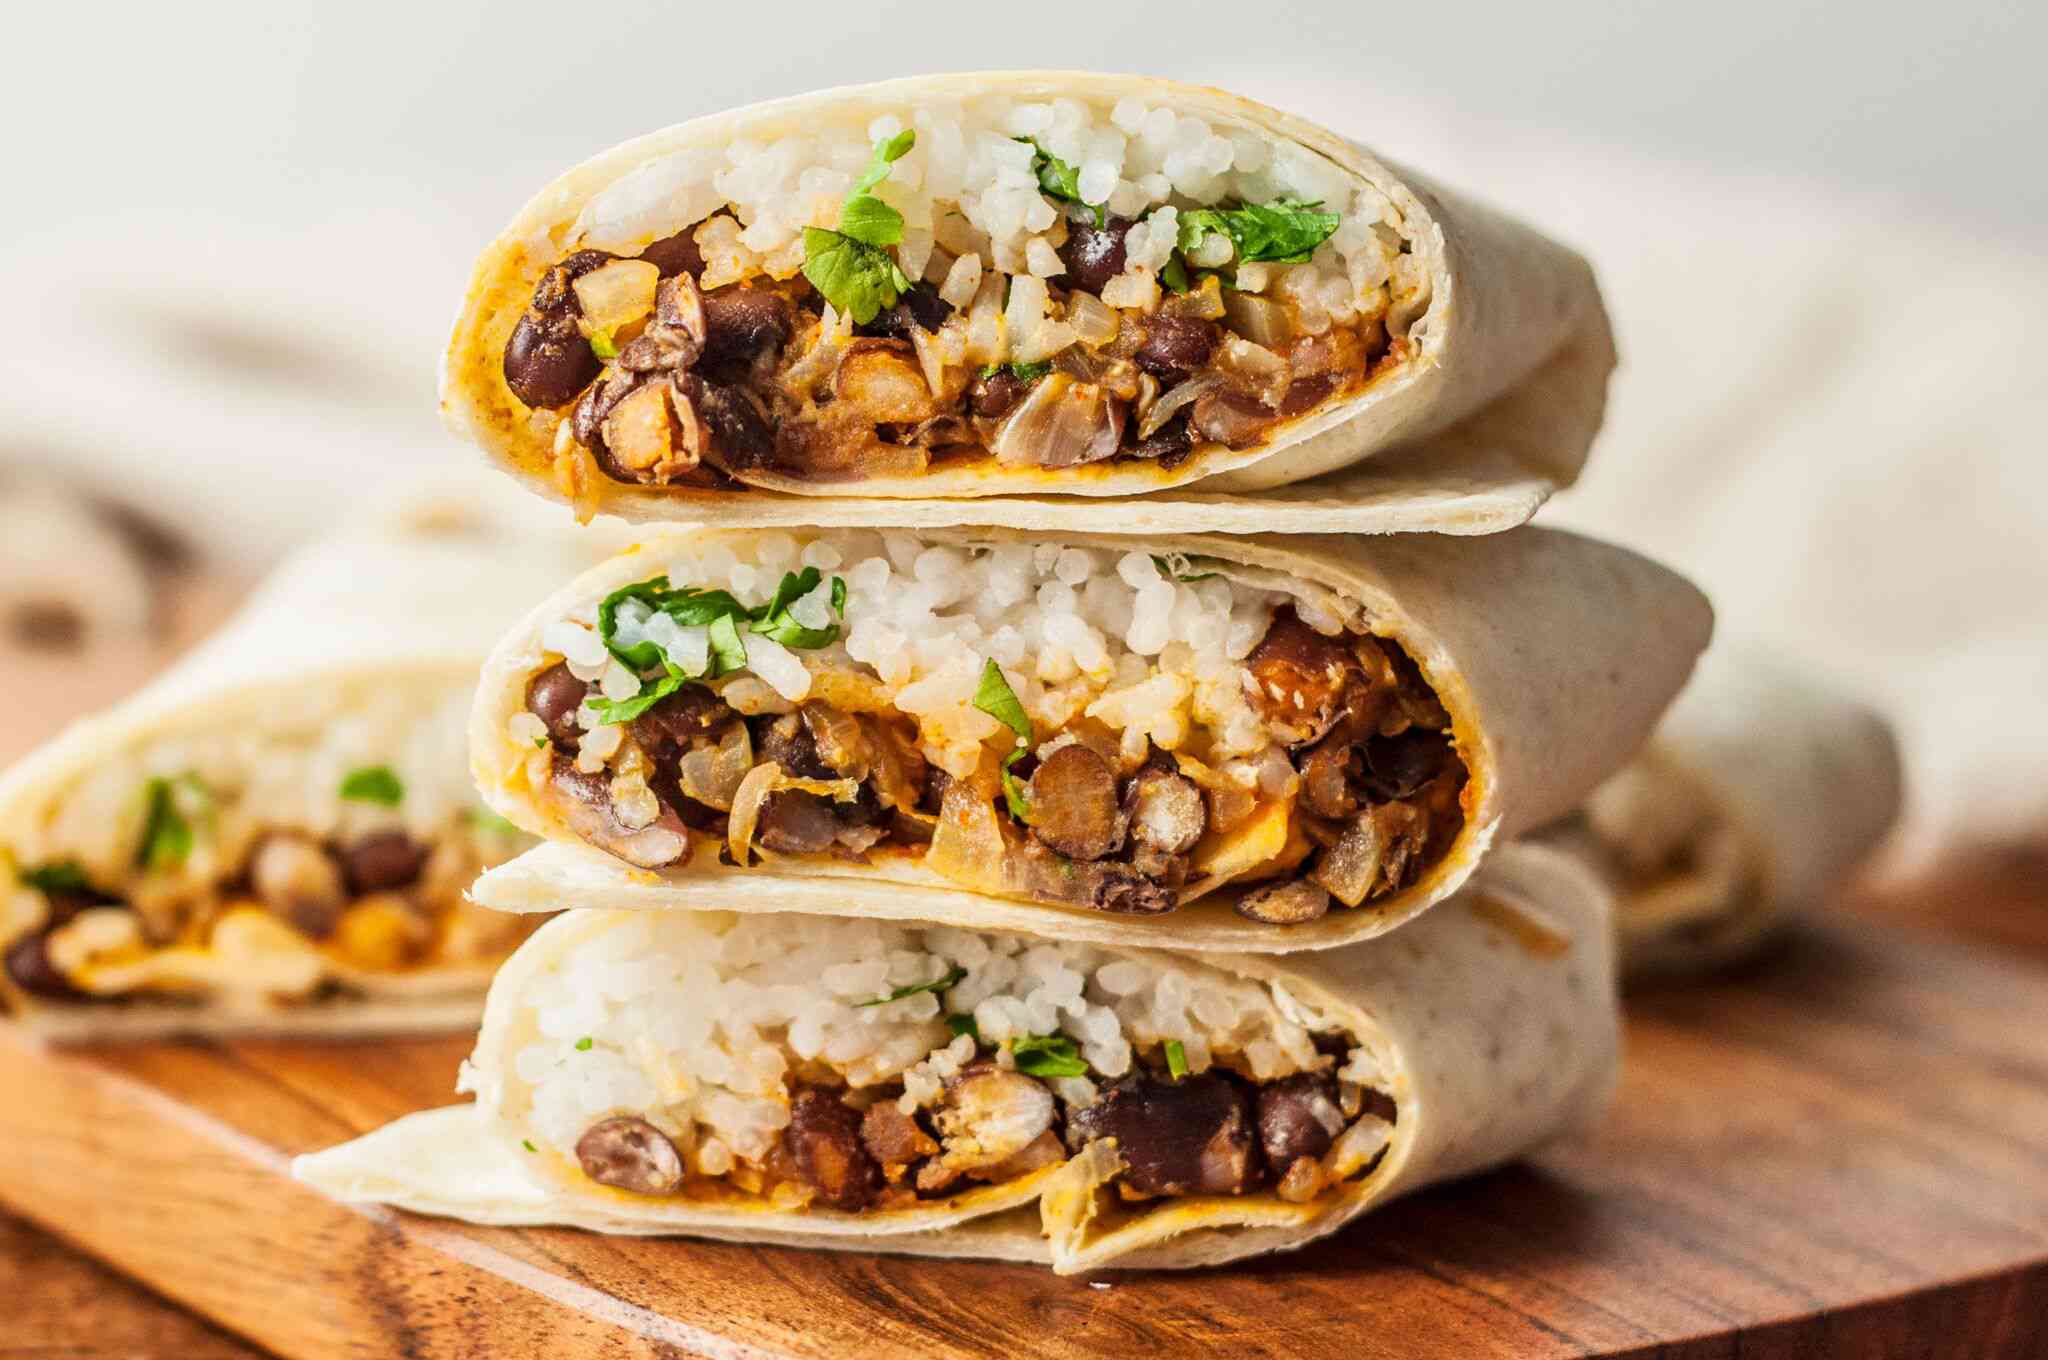
Rice & Bean Burrito

It’s been quite a while since including a recipe from one of my favourite countries ¡México querido! 

Admittedly though there is a debate on whether or not burritos are actually Mexican or if they are Tex Mex food. After living in Mexico and travelling up and down the country I´d probably sway to say they are Tex Mex as I had a hard time finding burritos in Mexico. With a lot of questioning and persistance, and the help of my local friends I found some, eventually. Funnily though, this experience doesn´s seem to register with my brain and I still think of México when I hear burritos. I mean, the ingredients are all quintessentially Mexican! It’s all about how we frame it, right?

Ingredients for 1 large or 2 small burritos

For the rice:

  • 1 Tbsp olive oil
  • 100 gr rice (jasmine/basmati/brown – any you like)
  • 100 ml spicy tomato salsa “salsa roja
  • 1/2 tsp salt

For the beans:

coriander / cilantro
  • 1/2 onion
  • 200 gr kidney beans (or black beans, if you want)
  • 2 Tbsp olive oil plus some for frying
  • 1/2 tsp garlic powder
  • 1/2 tsp onion powder
  • pinch of salt
  • Cholula chipotle hot salsa
  • 1/2 avocado
  • 1 large or 2 medium/small tortilla wraps
  • parsley or coriander to garnish

Preparation

  1. Fry the rice with a bit of olive oil in the saucepan before adding the water and the salsa roja to cook the rice in. Cook rice as indicated on the pack.
  2. In the meantime, finely chop the onion and rinse the beans.
  3. Heat some oil in a frying pan and add the onion and the beans and fry at a high heat. After a short while reduce the heat, and add the onion powder and the garlic powder, some salt and some Cholula chipotle hot salsa to add some additional depth of flavour and spice.
  4. Add about 80ml of water and let all simmer for about 2-3 minutes.
  5. Roughly squash the bean-onion mix with a potato masher. If it’s too dry, add some more water.
  6. Cut the avocado in half and cut one half into some slices.
  7. Heat the tortilla wrap in the microwave for a couple of seconds, then add the rice, the bean-onion mix, and the avocado slices in the middle of the wrap and spread out slightly. Add some more Cholula chipotle hot salsa if you want, and sprinkle the chopped coriander or parsley on top.
  8. Roll, fold, or wrap it up whichever way you want and enjoy!
Credit: Simply Organic

Do you enjoy the plant-based culinary trip around the world? Please leave us your contact details below, and we’ll ensure that you’re notified via email when we’re posting a new vegan recipe! You don’t have to struggle for Veganuary – we’re here to keep it fresh and varied!

[wpforms id=”651″]

post

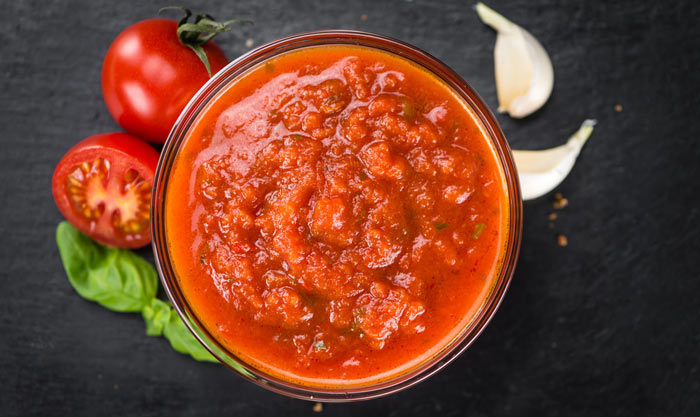
Salsa roja

There’s nothing like a traditional home-made Salsa roja, a classic Mexican salsa you’ll always find on the table in any Mexican house, any restaurant, any taquería, you name it. The degree of their spiciness varies depending on the type of chili that is added, and on the family recipe that was handed down for generations. It’s an absolute ‘must try’ in my opinion!

Super simple for a starter let’s go with a classic recipe! I may go for some more elaborate versions in the near future, after consulting with my queridos amigos 😉

Ingredients

  • 6 plum or heirloom tomatoes
  • 2 jalapeño peppers (1 if you prefer less spicy salsa)
  • 1/2 cup freshly chopped coriander
  • 2 garlic cloves
  • salt to taste


Preparation

  1. Wash the tomatoes and cut them in quarters.
  2. Cook them with a bit of water in a pan or pot so they release their juice. Add just enough water so they don’t stick to the bottom of the pan or pot, not more.
  3. Now add the garlic cloves (unpeeled), the jalapeño peppers, and some salt and cook for about 5 minutes with the tomatoes.
  4. Remove from the heat and allow to cool down a bit before fishing out the garlic cloves, removing their skin, and grounding the entire mix either classically in a mortar with a pestle, or more ‘modernised’ in a food processor or blender. I don’t have a mortar large enough to contain the quantity so always use a food processor to whizz it all up.
  5. Optional step: Strain the salsa through a sieve to remove any seeds or tomato skin, if you wish.
  6. Now you can mix in the finely chopped coriander and some more salt to taste, and serve this salsa either still warm, or chilled down after about 30-60 minutes in a fridge.

This salsa is fabulous with any veggie dish! On a toastie, a spoonful in a salad dressing, on rice, on a sandwich or in a sandwich wrap – the options to spice up your dishes is endless!

¡que aproveche! 🙂

Do you like to stay informed when we’re sharing new international plant-based recipes? Feel free to leave us your details below and we’ll send you an email when we upload a new plant-based recipe!

[wpforms id=”651″]


post

Raw broccoli salad

Broccoli goodness – yeah! I LOVE broccoli but became quite curious a couple of years ago how to prepare a delicious meal with broccoli, which doesn’t involve cooking it to death. Which is, if we are honest, what most people do. Nearly all the nutricious goodness is gone after the boiling process, and whilst steaming seems marginally better, I wanted more crunch.
So the idea came along to eat raw broccoli! Indulging in some of my favourite pastimes – searching for food inspirations in the www (I call it foodling, not googling), I found what I was looking for.

A raw vegan broccoli salad! I was sold, and so I hope are you!
Reading through the ingredient list was intriguing as I couldn’t imagine how these flavours and textures would all come together to a harmonious dish. But, I was proven wrong and since then I’m hooked. I made this salad various times now, served it to friends and family and we all agree – it’s a keeper! Here it comes for you, tried and tested 🙂

Ingredients for 6

For the salad:

two broccoli crowns
  • 2 large broccoli crowns*, finely chopped
  • 1 1/2 cups red grapes, seedless and halved
  • 1/3 cup roasted almonds, chopped
  • 1/3 cup dried raisins or cranberries
  • 3/4 cup red onion, diced

For the dressing:

  • 3/4 cup raw cashews, soaked 3-4 hours or ideally over night
  • 1/4 cup water
  • 2 Tbsp maple syrup
  • 2 Tbsp apple cidre vinegar
  • 1 garlic clove
  • salt and pepper to taste

*Waste not – want not “nugget”

Don’t throw away the broccoli stems! Chop them up roughly and place the bits into a food processor and blitz them up until you get really small pieces. You’ll see in the next paragraph why.
Once you got the finely blitzed broccoli stems out of your food processor, spread the “pieces” out slightly and set aside for at least 90 minutes.
After than you can place all into an airtight food container an use it for your next broccoli soup, or as garnish sprinkled over salads, in sandwiches, or place it in the freezer for your next vegetable soup.

Nutritional “nugget”

Did you know that we can reap the full cancer-fighting potential of broccoli’s sulphurophanes when we chop it finely and let it sit for up to 90 minutes? Exposing the finely chopped broccoli to air activates the enzyme that promotes sulforaphanes. Normally this enzympe is damaged when we cook or steam broccoli, but it is maintained when we eat broccoli in its’ raw form. What was suprising though to me was the fact that you can actually increase or promote sulforaphanes when you chop the broccoli and let it sit out for a good while.
The finer you chop it the better (you may even put it into a food processor and whizz it up) and the longer it’s out the better too.
You may keep this in mind when preparing soups, but for this raw broccoli salad it may not be the ideal “bite”size.

OK – let’s get to it!

Preparation

  1. Finely chop the broccoli crowns and let it sit for at least 30 minutes.
  2. Lightly dry roast the almonds in a pan until they start releasing their nutty aroma and turning golden brown. Alternatively you can roast your almonds in an oven for max. 10 minutes at 180°C. Set aside to cool down slightly.
  3. Chop the opion and set aside.
  4. Wash and half the red grapes and set aside.
  5. Once the almonds are cooled down, chop them up roughly.
  6. Prepare the dressing by blitzing the drained cashew nuts, with all other dressing ingredients in a food processor or a Nutribullet until smooth and creamy.
  7. Now all ingredients can be mixed together in a large salad bowl. Toss the salad until the dressing evenly covers all ingredients.
  8. ENJOY!!
vegan broccoli salad with almonds, raisins, and grapes

If you enjoy this and other recipes on our side, why not leave us your details below and we’ll ensure to notify you when we post new recipes on out site.

[wpforms id=”651″]

Do you enjoy this recipe format with some extra nutritional and sustainabiliy information? Please let us know in the comments below or share your comments on your social media using the hashtags #Veganuary and #VeganWorldCitizen 🙂

post

Homemade shortbread

vegan shortbread
vegan shortbread for National Shortbread Day 2019

Today is National Shortbread Day – who knew? So, what’s so special about shortbread? A food item we don’t seem ot pay much attention anymore these days when passing the supermarket isles. Doing some quick research we found out that shortbread is credited to Mary, Queen of Scots and was considered a luxury treat that was only served on special occasions in the 16th century.
Fast forward a couple of centuries it doesn’t seem to evoke quite the same reaction anymore. So to honour the 06th Jan let’s comemorate this luxury treat once more – of course fully veganized!

Ingredients

  • 125gr (1 cup) all-purpose flour
  • 50gr (1/4 cup) sugar
  • 1/4 tsp salt
  • 112gr (1/2 cup) vegan butter

Preparation

  1. Preheat the oven to 150°C.
  2. Sift the flour and add it to a mixing bowl. Add the sugar and salt and mix together.
  3. Then add the vegan butter, rubbing it in with your fingers. It will first be crumbly and then gradually will form into cookie dough.
  4. If you want shortbread cookies, form the cookie dough into a ball and then flatten it out on a flour dusted surface and cut out some cookies. You can either use a rolling pin or your hands to flatten it out. The dough is quite fragile, so if you use a rolling pin, you can roll and sort of press at the same time. Dust the top of the dough with flour so that the rolling pin doesn’t stick. Roll the cookies in sugar and place onto a parchment lined baking tray. Roll the remaining dough into a ball again and flatten out again, cutting out more cookies and then repeat. At the end you’ll cut out your final cookie, and whatever’s left won’t be enough for a last cookie, so just roll into a small ball, roll it in sugar and add it to the baking tray as a bonus cookie.
  5. Alternatively, place the dough on a lined baking tray, and roll out evenly to about 5-8mm thickness with a rolling pin. Then cut the rolled out dough into segments of your desired size (fingers, squares, etc.).
  6. Bake in the oven for 45 minutes.
  7. After 45 minutes, remove from the oven and allow them to cool for around 30 minutes before eating.

Are you enjoying the discovery of newly veganized food inspirations this month and want to be the first to know when we post new plant-based recipes? Please leave us your details below, and we’ll send you an email each time we upload a new recipe to our site.

[wpforms id=”651″]

post

Home-made butter

Butter and cheese are probably the hardest things to “give up” or “cut out” when transitioning to a fully plant-based lifestyle. To put you at ease during the first month, during Veganuary, we’ve posted a smoked vegan cheese recipe a few days ago, and now comes the recipe for vegan home-made butter. No palm-oil, no emulsifiers, nothing processed – just good home-made spread!

Ingredients

nutritional yeast
  • 48 gr almond flour
  • 150 ml unsweetened cashew milk
  • 3 gr nutritional yeast
  • 3-5gr salt
  • 5 ml apple cider vinegar
  • 60 ml olive oil
  • 240 ml coconut oil, refined if you don’t want the butter to taste of coconut

Preparation

  1. Place almond flour, cashew milk, nutritional yeast, salt, and apple cidre vinegar into a blender and blend until smooth. The mixture should be completely smooth without any grainy bits.
  2. Pour in the refined coconut oil and olive oil then blend on full speed until velvety smooth and light. Blend the mixture for at least 2 minutes so a lot of air gets in.
  3. Pour the vegan butter into an old-fashioned butter mold or silicone molds. Place it in the fridge and let it set. Depending on the size of your container, it might take several hours for the butter to solidify.
  4. You can use this vegan butter just like you would regular butter. However, I don’t recommend using it when high temperatures are involved. This includes frying, broiling, and grilling.
  5. Store leftover butter in an airtight container in the refrigerator for up to 2 weeks. For longer term storage, freeze the butter in silicone ice cube trays. Once set, squeeze the butter cubes out and keep them in a sealed freezer bag for up to 3 months.

Looking for more plant-based essentials, delicious dishes, drinks or desserts? Be the first to be informed when we upload our new plant-based creations by leaving us your details below.

[wpforms id=”651″]

post

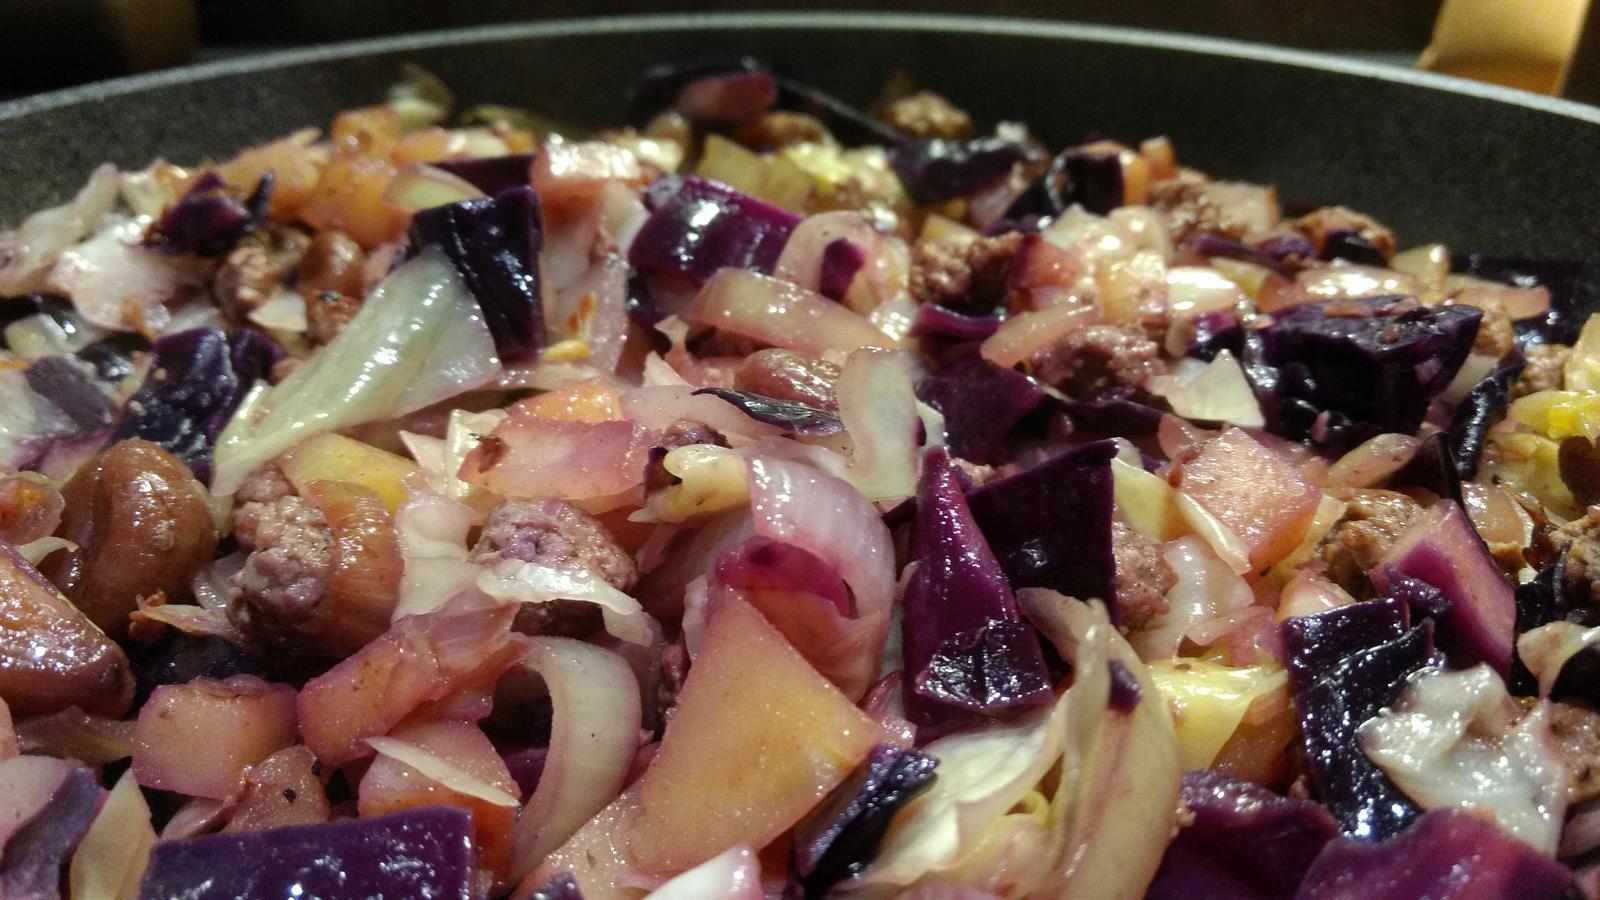
Chestnut, pointed and red cabbage & potatoes au gratin

Now, this is a real winter dish and cabbage is the seasonal eat you may want to opt for as it packs a nutritional punch. This recipe is normally neither vegeterian nor vegan, so I modified it to come up with a 100% plant-based option of this home-made hearty and panfresh dish! Hope you’ll like it!

Ingredients for 2

Preparation

Cut cabbage and cubed potatoes
  1. Finely chop onion and garlic and set aside in a small dish.
  2. Cut the cabbages into about 1-2cm pieces or shred, as you prefer. Set aside.
  3. Cube the potatoes and set aside.
  4. Prepare the soy mince as per package instructions and fry with the oil in a pan, adding salt and Tabasco to taste. Fry for about 3-5 minutes.
  5. Add the minced onion and garlic and keep frying.
  6. Roughly chop the chestnuts, or add them whole and fry for 1-2 minutes before delgazing the pan with some white wine.
  7. Add the cut cabbage and the cubed potatoes and fry the mix for a couple of minutes before adding some more white wine and placing a lid onto the pan to allow the vegetable mix to simmer for about 20-30 minutes on a low heat.
  8. Cut or grate the smoked cashew cheese and place into the pan, turning off the heat. Place the lid back on for a couple of minutes allowing the cheese to melt.
  9. Enjoy 🙂 !!

Are you looking for further plant-based inspiration to get you through the vegan challenge this Veganuary? Do you want to be amongst the first to know when we post new plant-based recipes? Please leave us your details below, and we’ll email you as soon as we release a new recipe on our website.

[wpforms id=”651″]

post

Smoked cashew cheese

vegan smoked cheese served with red grapes on a wooden board
Credit: LifeStroll

It’s an absolute must to include some homemade vegan cheese receipes this month, for Veganuary. Most people struggle to become fully plant-based becasue they cannot imagine ever giving up cheese. Fear not – there are fabulous homemade options, and more and more seem to populate the www every single day. Our appetite for cheese seems unsatiable, so your wish is our command.

Adapting the plant-based lifestyle is not, nor shall it be, about “missing out”, or “restrictions”. There are so many wonderful opportunities to explore the new rich variety of plant-based cheeses, and making your own cheese – c’mon – how awesome is that? No highly processed “plastic” cheese and you know exactly what goes into it. Win – win!

Ingredients

  • 2 cups water
  • 1/2 cup raw cashew nuts
  • 3 Tbsp nutritional yeast
  • 2 Tbsp virgin coconut oil, melted
  • 1 Tbsp liquid smoke
  • 2 tsp salt
  • 2 tsp smoked paprika
  • 1 tsp granulated onion
  • 3 Tbsp tapioca
  • 2 Tbsp Kappa Carrageenan

Preparation

  1. Soak cashew nuts over night.
  2. Combine the water, soaked cashews, nutritional yeast flakes, coconut oil, liquid smoke, salt, smoked paprika, and granulated onion in a blender and blend until super smooth; i.e., until there aren’t any bits of nuts left. Add the tapioca and Kappa Carrageenan, and blend for 5 to 10 seconds until smooth.
  3. Pour the cashew mixture into a large saucepan, and bring to a simmer over medium heat, whisking continually. Continue cooking, stirring the mix continuously for about 7-9 minutes until it has thickened nicely and is very glossy.
  4. Pour the cheese into a smallish container that can contain a minimum of 2 cups volume like a small loaf pan or a glass bowl.
  5. If properly cooked, the cheese will start to set right away. Allow the cheese to set at room temperature for 30 minutes. Then cover and refrigerate the cheese to finish setting for 3 to 4 hours.
  6. If the cheese doesn’t set up properly that means you haven’t cooked it long enough, if this happens to you, throw it back into the saucepan and cook for a few minutes more! It’ll re-melt and then you can pour it back into the mold for it to solidify.
  7. Remove the cheese from the mold and serve.
Smoked vegan cashew cheese served on wooden platter with red grapes
Credit: 86 Eats

Craving more vegan cheese recipes and other plant-based treats? Feel free to leave your details below, and we’ll email you as soon as we post new recipes on our website!

[wpforms id=”651″]

post

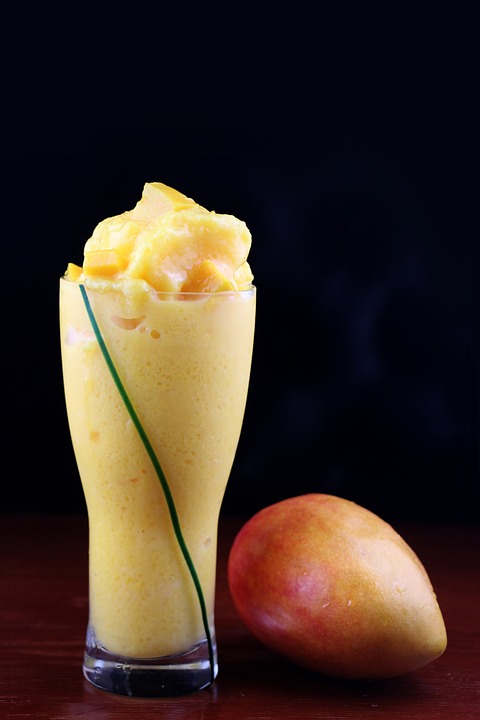
Apple Mango Lassi

Hoping that you all had a fantastic start into 2019, and in case you had to nurse a hangover, I hope the Ginger Miso Soba Soup helped you to get through the day!

Starting a new year afresh is what we all aspire to. This following recipe is normally a refreshing summer drink so thinking of a refreshing start I pulled this forward to the start of this year! Start afresh, drink summer drinks in winter, break conventions – and 2019 will be yours 🙂

Apple Mango Lassi, Mango Lassi, Lassi, Indian, summer drink, refereshing,

Ingredients for 2

  • 200gr organic silken tofu
  • 1/2 lemon
  • 200ml water
  • 185gr apple-mango-puree
  • 1.5 Tbsp soft brown sugar
  • pinch of salt

Preparation

  1. Juice half a lemon to get appr. 15ml of lemon juice
  2. Add all ingredients into a blender and blend until you get a smooth or even frothy mix.
  3. Serve fresh and enjoy, or place in the fridge for up to two days.
Apple Mango Lassi

Thirsty for more plant-based recipes this month, and beyond? Feel free to sign up by leaving your contact details below. We’ll email you as soon as we post a new recipe!

[wpforms id=”651″]