post

Overnight Chia-Oat pudding

Chia pudding topped with berries, overnight chia oat pudding

The early bird catches the worm – and the late one the Chia pud!

I am not a morning person, no matter how often I try to trick my mind into it. My body just doesn’t follow. Maybe it’s time to embrace the ‘late night me’, shedding my sense of guilt once and for all. Science long suggests that night owl tendencies are hard-wired into our genes. Apparently it is the gene CRY1 that is to blame for my circadian clock running behind. That means I wake up later than normal, and go to bed later than normal. 
From the quantity of overnight oats recipes spreading in the internet, I can only assume that I am not the only one with CRY1. 

It was for all of us that overnight oats were invented. I assume that, at least. 
I’ll share my favourite recipe with you here. I make it almost every other night, pop it into my fridge – et voilà  – breakfast is sorted in 5 minutes.

All you need is

  • A medium size mason jar with a lid
  • 150gr dairy-free joghurt
  • 2 Tbsp chia seeds
  • 2 Tbsp oats
  • 3 Tbsp dairy-free milk
  • 1 Tbsp nut butter
  • 1 tsp agave nectar
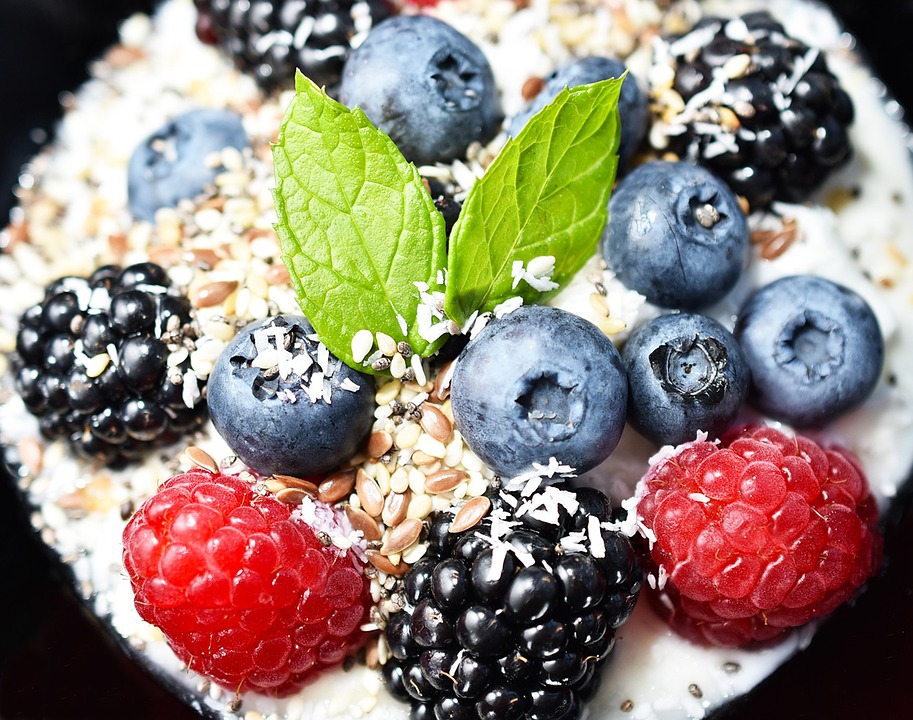
  • 4 Tbsp frozen berries
  • 1 nectarine, sliced

Then…

There are two different ways to prepare this delicious protein rich breakfast that’ll leave your satisfied until lunch time.

  1. Mix the yoghurt, agave nectar, chia seeds, and oats, nut butter, and milk in the mason jar. Top off with frozen berries, put on the lid, and place in the fridge over night. Add nectarine slices the next morning.
  2. Mix the yoghurt, agave nectar, chia seeds, and oats, milk, and 2 Tbsp of frozen berries in the mason jar. Top off with nut butter and 2 Tbsp frozen berries, and place in the fridge over night. Add nectarine slices the next morning.

Did this leave you hungry for more? Would you like us to send you our plant-based recipes per email as soon as we share them on our site? 
Feel free to sign up!

[wpforms id=”651″]

Let me know in the comments below or our contact form if you’re interested to send you translations of the recipes into German, Spanish, or Portuguese. 

post

Mandarin Chia Muffins

Mandarine Chia Muffins

Winter temptation…

Every now and then I feel like I need a sweet afternoon treat. Funny though, I only feel that way in winter as it is getting colder. I am perfectly fine to go all summer without “sinning”, but as soon as temperatures drop I cannot help but wanting to enduldge in some sweet baked goods.Pastries are pretty much off the menu since becoming plant-based, at least when I’m ‘out and about’. They’re mostly sugar-laden anyway so I prefer to come up with something more wholesome. 

Seasonal & Healthy 

I sometimes wonder if I am a control freak because it gives me an immense sense of satisfaction to prepare my food from scratch back home. I have full control over what goes in and what stays out. 

This muffin recipe intrigued my directly: mandarines and chia seeds! Mandarines are seasonal, now that the temperature drops and we’re heading towards the festive season. I catch myself so many times these days closing my eyes and allow my olfactory sense to take in the sweet yet tangy aroma when somebody next to me on the tube or bus peels a mandarine.

Well, and chia seeds? They are my every day glorious omega-3 fatty acids essential, and whenever I see a recipe with them, they attract my immediate attention. Especially, but not only, in winter. Why? Do these symptoms sound familiar to you as the colder weather and shorter days set in? Fatigue, dry skin, mood swings, depression and poor circulation? These symptoms generally worsen during the long cold winter months but can as well be caused by deficiencies in these essential fatty acids. So I’d rather eat some muffins to prevent that 😉

Enough said, let’s get started: ready, steady, mix and bake!

Ingredients

  • 50gr flour (Type 1050)
  • 75gr flour (Type 550)
  • 25gr spelt flour 
  • 1/2 tsp baking soda
  • 3/4 tsp baking powder
  • 5gr chia seeds
  • 75gr cane sugar
  • 125gr dairy-free yoghurt
  • 30ml dairy-free milk
  • 25gr agave nectar
  • 30ml oil
  • 1/2 ml mandarin oil / orange oil 
  • some grated peel and juice from 2 mandarines

Preparation

  1. Pre-heat the oven to 175C.
  2. Grease a muffin form or place paper muffin moulds into the muffin form for 6 muffins.
  3. Dry ingredients: Mix the flours, baking soda, baking powder, chia seeds and sugar in a mixing bowl.
  4. Wet ingredients: In a seperate mixing bowl, mix the yoghurt, milk, agave nectar, mandarin oil, and oil. Then slowly add the mandarin juice and the peel.
  5. Add the wet ingredients to the dry ingredients and fold them in with a spoon, and mix until you get a smooth dough.
  6. Add the dough to the muffin moulds, filling them only to 3/4.
  7. Place the muffin form into the oven for appr. 25 minutes, and check with a wooden stick if ready. The muffins are ready if the wooden stick comes out dry (there’s no wet dough sticking to it). 
  8. When ready, remove from the oven and allow to cool down before serving
Enjoy!!

Never want to miss another delicious plant-based recipe again? Or want us to email the recipes to you?
Please leave me your details below, and we will send you updates as soon as we share another post on this website.

Let me know in the comments below or our contact form if you’re interested to send you translations of the recipes into German, Spanish, or Portuguese!

[wpforms id=”651″]

post

Broccoli creme soup

I love soups as it gets colder outside! This one is an all-time fave of mine, and it seems great for the next chilly days that are forecasted. Not only will it warm you from the inside out, but it’s super healthy too.

Broccoli is another healthy member of the cruciferous vegetable family, like cabbage, kale, cauliflower, Brussels sprouts, bok choi and many more. If you’ve seen my past recipes you may have noticed that I cook with these veggies on a very regular basis. Why? All cruciferous veggies have a wonderful component, which makes them so incredibly beneficial for our health. I have shared some of these benefits in my stir-fry ginger cabbage recipe.

Now, did you know that you can make broccoli even healthier by chopping it into small pieces before cooking it? Apparently the finer you chop it, the better! Chopping the broccoli activates the enzyme myrosinase, which in turn causes sulforaphane to become available for absorption. To allow the sulfurophane to ‘develop’ it’s important to let is ‘rest’ for at least to 30 minutes before cooking it. ‘Resting’ times between 30 – 90 minutes are most beneficial to maximise sulforaphane absorption according to some research.
It was last year that I came across this interesting fact and now it became second nature for me when preparing any dish with broccoli:

  1. chop finely
  2. wait for at least 30 minutes 

With this information ‘out of the way’ let’s get to our creamy soup!

Ingredients

  • 500gr broccoli
  • 1 small onion
  • 1 Tbsp oil
  • 1/2 Tbsp vegan butter/margarine
  • 1 Tbsp flour
  • 1 1/2 Tbsp white wine
  • 500ml vegetable stock
  • 100ml vegan cream (soya/oat)
  • 1/2 tsp salt
  • 2 Tbsp almond flakes or chopped almonds
  • some pepper and nutmeg to taste

Preparation

  1. Wash broccoli and chop finely
  2. Set aside for at least 30 mins
  3. Go and enjoy something else in the meantime like reading, chatting to a friend, or taking a power nap 😉
  4. Come back and chop the onion finely. Heat some oil in a deep pan and add the chopped onion, and glaze at medium heat for 1-3 minutes. 
  5. Then add the vegan butter/margarine and the finely chopped broccoli and dust the flour over the mix. Gently stir and cook for 2 minutes.
  6. Add the white wine, the vegetable stock, and the cream and cook everything for 5-10 minutes, until the broccoli is cooked.
  7. Once cooked, turn off the heat and carefully blend all ingredients with a hand blender. Then season with salt, pepper, and nutmeg.
  8. Serve in bowl sprinkling the almond flakes / chopped almonds over the soup.

Enjoy and stay warm!

post

Dal “Makhani”

There is no point in trying to hide my obsession with Indian food. It’s just too good!

It’s all about connection

Just two nights ago I met an absolutely lovely group of people, all of them, but one, strangers to me. I could not have forseen that 3 hours later we’re all invited to an after-midnight dinner. To a house of a person that I didn’t even know a couple of hours earlier… That’s unheard of these days! 
It wasn’t Indian food that was served yet I realised once more how many meaningful connections are made at a dinner table, over a fine meal and a glass of wine. Good home-made food just has this magic to connect people of all different walks and talks of life, and for that reason alone I love it!

So why did I pick this Punjabi dish for today’s World Vegan Month contribution? Amongst the friendly and open hearted group of people was a sweet young lady from Bombay with family ties to the Punjab and Assam region. We were all dazzled by the stories she shared with us that night. We spoke about Assam tea plantations and Punjabi food, and my mind travelled to these far places whilst she passionately narrated her family stories. 

Despite the fact that we stayed late that night I made a promise to myself. To prepare a Punjabi dish as soon as I’d get the opportunity. I now have a very different relation to Punjabi dishes, thinking of this lovely night and unique connections that were made. It just makes me smile 🙂 

Beans are back

Beans are an absolute staple in my kitchen as they are super healthy and nutritious. Oh, and they’re featuring in so many delicious vegan recipes. I always stock up on black beans, butter beans, kidney beans, and mung beans.  I’ve already hyped black beans when sharing my favourite vegan feijoada recipe, so please check it out if you want to learn more about health benefits of beans. 
This dal uses kidney beans, not black beans, but those fair really well on nutritional value too!

Good things take time

This creamy and rich dal takes some time in preparation. More time that I’d usually give myself for cooking – BUT it’s totally worth it. There is a direct correlation between my growing anticipation and appetite and the time it takes to simmer. I love the power of a mouthwatering aroma spreading through your entire apartment!

This said, to not use up any more of your time – here’s the link to another popular veganized dish I cannot imagine living without. A mouthwatering .

A good home-made dish deserves a good home-made spice mix to further enhance the sensational experience for your taste buds. Please check out my recipe for the Punjabi Garam Masala

 Be ready to be dazzled!

post

Mini Pizza Snacks

Do you sometimes get this Pizza craving? Just for a bite or two? Not the whole Pizza? I know, I do. Don’t get me wrong, I LOVE Pizza and can eat the whole thing, but sometimes it’s just that little bite that I need. 

One of my favourite vegan bloggers luckily came up with a solution to that. Anja once more shows how creative the plant-based cuisine can be, and moreover, demonstrates that we don’t need to cut out on all beloved comfort foods. 

My mouth is watering already, and since it only takes about 20 minutes to get some mini Pizza snacks on the table – I know what I’ll do now 🙂

Here’s to you too!! – enjoy!

Credit: itsPotluck
post

MAC ‘N’ CHEESE

I have a couple of confessions to make before I share this next vegan recipe with you. Having these out of the way at the very start is probably a good idea, but I let you be the judge of that.

  1. I’ve never eaten Mac ‘n’ Cheese in my life. Like in, well, ever. I wonder that that says about me as a person. Now, that I gave up on cheese more than 3 years ago, the idea of having Mac ‘n’ Cheese shouldn’t be appealing any more, right? Strangely though, it is very appealing to me right now. I mean, there is a hype around this dish for a reason I assume. 
  2. I still crave the taste of cheese. There it is. I said it. That insight puzzles me even more than the previous one! I mean, I have never been a big fan of cheese. The only save options I’ve ever considered in over 30 years before turing plant-based were gouda, “butter cheese”, mild camembert, and eventally with some bravery gruyere. Everything else I just snubbed – at best.
  3. I still have some pumpkins from the not so recent any more Halloween season sitting on my window sill. Am I the only one? They seem to last forever, so I tend to dismiss the ‘urgency’ to actually chop them up and prepare a nice dish with them.

Let’s change that – Pumpkins, here I come

Maybe it’s purely for the reason that I still have left over pumpkins that I settled for . Or it was the fact that using processed vegan cheese didn’t feel revolutionary enough for me (nor would I want to endorse processed foods!). Maybe I wouldn’t find a cauliflour-cheese-base that paletable. Or a potato-carrot ‘cheese-base’. 
Most likely, it’s a combination of all the above. There are endless alternatives these days to ‘veganize’ pretty much any dish. 

So much more than Halloween decoration

The natural colour of a whole-food normally gives it away already. The richer and deeper the colour, the more nutritious they are. Therefore : Eat the rainbow!

Pumkins are one of the best-known sources of beta-carotene, which gives them such a vibrant orange colour. Beta-carotene is a powerful antioxidant, which our body converts into Vitamin A when we ingest it. This Vitamin A is essential to prevent degenerative damage to the eyes as we probably all know from our parents, who always told us to eat our carrots. That’s not all though that beta-carotene has on offer. There are certain types of cancer that may be reduced by regular beta-carotene intake.
Additionally, the fiber, potassium, and vitamin C content in pumpkin all support heart health. What’s good for our heart, is almost certainly linked to healthy blood pressure levels too. So that’s two benefits  in one! 

Maybe by now you’ll understand why my whole-food ‘veg-love’ runs deep. It’s so insanely healthy and protects us from almost all Western diet inflicted ailments. Having the prospect of living healthier and fitter? I’ll get me some of that!

If you want this too – 🙂 *

Don’t even bother with pumpkin puree from a tin as the recipe offers as an alternative. It’s not. Use your Halloween decoration to make a healthy comfort meal. Now that’s upcycling, not even recycling 🙂

Again, that’s two benefits  in one! Enjoy!!

post

Kale Quinoa Sweetcorn salad

Credit: Jo Cooks

Did you notice that I hadn’t posted a single salad recipe yet? In nearly 2 weeks? That is probably the most common yet mislead perception that almost all non-vegans have: that vegans only eat salad. I cannot count the times anymore that some helpless looking face in a hotel, a restaurant, or anywhere else for that matter offered me a salad after I informed them that I am vegan

Not wanting to disppoint anybody then, here comes my absolute favourite salad recipe 😉 It’s from my beloved vegan cook book, and once more I’ll translate from German to English for you. It’s really worth it! This salad is far from the boring concoctions that I get plated up in aforementioned scenarios. 

Ingredients

For the salad:

  • 50g Quinoa (or if you want a quicker salad: couscous)
  • 100ml vegetable broth
  • 200g Kale
  • 1 small or medium sized onion
  • 1-2 spring onions / scallions
  • 100g Sweetcorn
  • 20g Almonds
  • 2 Tbsp Sesame seeds

For the dressing:

  • 1.5 Tbsp Olive oil
  • 1.5 Tbsp Sesame oil
  • 1.5 Tbsp Lemon juice
  • 0.5 Tbsp Agave nectar
  • 0.5 tsp White wine vinegar
  • Salt and Pepper

Preparation

  • If you settle for the quinoa: boil quinoa for appr. 10-15mins in the vegetable broth. 
  • If you settle for the couscous: put cousous into in a small bowl and pour the boiling vegetable broth over; place a lid over it and let it sit for a couple of minutes 
  1. Wash the kale and chop finely, including the stem. Kale stems are loaded with vitamins, fiber and nutrients because the stem is the component that is rooted in the soil!
  2. Finely chop the onion. 
  3. Heat up a deep frying pan with some olive oil and once the oil is hot, add the chopped onion and glaze at a high heat for 1-2 minutes. Then add the chopped kale and fry for appr. 5 minutes, stirring occasionally. Then set aside to allow it to cool down a bit.
  4. Wash then finely chop the spring onions / scallions
  5. Chop the almonds with a chef’s knife
  6. Dry-roast the sesame seeds in a small frying pan until golden. Place a lid to avoid sesame seeds popping out of the pan!
  7. Pour dressing ingredients into a small glass jar (that you have a lid for, too), add salt and pepper, close with a lid and shake to mix ingredients.
  8. Place all salad ingredients into a salad bowl and mix well. Then pour the dressing over, and mix again.
  9. Enjoy every mouthful 🙂 
post

Peanut Butter & Jelly Smoothie Bowl

Credit: Pick Up Limes

New morning, new week – new start. Let’s do some positive re-framing and skip the Monday morning blues but instead look at Monday as an opportunity for a fresh start! 

And what better way to start fresh than with a nutritious and delicious breakfast? Better still, having the beloved combo of peanut butter and jelly to kick-start your day sounds very managable. If you don’t give your subconscious mind something to rebell against, you can eat happily ever after. 

I can hear you say though “but….there’s no time!”

Monday morning rush

5minutes is all you need for this healthy smoothie bowl. 
So, without further ado, respecting your time, find the simple steps .

Credit: Pick Up Limes

Have a healthy week <3

post

Feijoada – Black bean stew

Credit: Vegetarian Times

I felt inspired to find a ‘veganized’ version of my favourite Brazilian dish because I met a beautiful lady from Brazil today. We had a nice chat and I am so happy I got to practice my Portuguese skills again. Believe me, it’s not that often that I meet somebody speaking Brazilian Portuguese, which is completely different to Portuguese from Portugal! As different as their cuisines dare I say. 

Brazil’s national dish

Many of you may immediately think of churrasco when you hear Brazilian food, but did you know that feijoada is the national dish of Brazil? 
Feijoada is a hearty black bean stew that is commonly served on a weekend. You’re meant to take your time to sit down with family and friends, and chat and laugh over a prolonged lunch that may last for hours. No rush when it comes to feijoada. Relax and enjoy!

Whilst the traditional feijoada is prepared with lots of meat, it can be easily modified to be vegeterian of even vegan. Once more I browsed the www and found a from Larissa. Tofu-free because I know that some of you don’t want to consume soya products, or not too much of them at least. I’ll do some more research on soya products and shall write up an article with some more information, pros and cons, soon. 

Spilling the beans

Beans like any other legume are low in calories, rich in protein, and packed with fibre and nutrients. I mentioned some of the amazing health features of legumes some days ago here, when I spoke about small but mighty peas.

Black beans come with an additional benefit: they strengthen your bones, help warding off heart disease and cancer, and help you maintaining healthy blood glucose and insulin levels. Moreover they help in managing high blood pressure, and weight. 

So – no more unhealthy weekends then! Right?

Typical feijoada side dishes –acompanhamentos

A traditional feijoada always comes with plenty of side dishes like white rice, chopped and fried collard greens, farofa, and either peeled oranges or fried plantain. So let’s not skip these sides.
Unknown to probably most of you will be the farofa. It’s a toasted cassava flour mixture, which, I admit, you need some time to get used to. It can be quite dry at times, so I recommend to mix it in well with your feijoada. 

farofa

Simple farofa side

  • 1 small red onion
  • 1 clove of garlic
  • 50ml olive oil
  • 200g cassava / manioc / yuca flour

Peel and finely chop the onion and garlic and add the onion to a frying pan over a medium heat for 6 to 8 minutes, stirring frequently, until soft.
Then stir in the garlic and cook for 1 more minute, and add the cassava / manioc / yuca flour.
Cook, stirring frequently, for 5 to 10 minutes, until it is lightly golden brown and resembles toasted breadcrumbs.
Serve in a bowl alongside your feijoada as a side dish.  Any leftovers can be reheated in a frying pan.

side dishes – acompanhamentos

Oh – and don’t forget the classic accompanying drinks: an ice-cold beer, cachaça, or caipirinha.

Bom apetite!

post

Chocolate spread

Oh yes!!! I cannot live without chocolate spread, or shall I say I don’t want to?
I am still trying and testing different recipes, and there are many, believe me. Luckily I found this super easy one recently, which I REALLY like. Its main ingredient is basically dates, oh, and some cocao. Good thing: I love dates; the edible ones I mean!
This heavenly spread is rich and creamy, and the hazelnuts give it the extra flavour punch.


I wanted to embed the link to the original food blogger, as I normally do, but she’s posting in German only. I thought I may spare you the google translate experience and give you the English version directly.

Ingredients

  • 250g soaked and softened dates 
  • 100ml non-daily milk (or water)
  • 80g soaked hazelnuts
  • 50ml coconut oil (optional)
  • 4 Tbsp cocao powder 
  • 1tsp vanilla powder

Preparation

Add the pre-soaked hazelnuts and non-daily milk (or water) into a and mix until you’ve got a homogeneous hazelnut milk. If you like some crunch to your chocolate spread, don’t soak the nuts for too long, and mix for a shorter time so you get some remaining hazelnut bits.

Add all remaining ingredients into the processor and mix until you’ve got a smooth creamy texture.
If the consistency is too thick, add tiny amounts of water or non-daily milk until you reach the desired consistency.
If the consistency is too thin, add another date or two.

That’s pretty much it. You’re done. Fill into a glass or other sealed container and store your vegan chocolate spread in the fridge. Use it within a week, I’d say…. if it lasts that long 🙂

It goes well with toast, pancakes, in your oats, and with banana. That’s all I can think of now. What do you combine it with? Please let me know in the comments below!