post

* Christmas cookies *

Christmas baking season has officially started! According to my family back home in Germany, that is.
Let’s ignore the fact that supermarkets offered us their take on Christmas confection and baked goods shortly after summer! At least, that’s how I perceived it. If anybody was able to avoid the somewhat premature Christmas commercials and sweet offers until now – well done! Please teach me how to 😉 

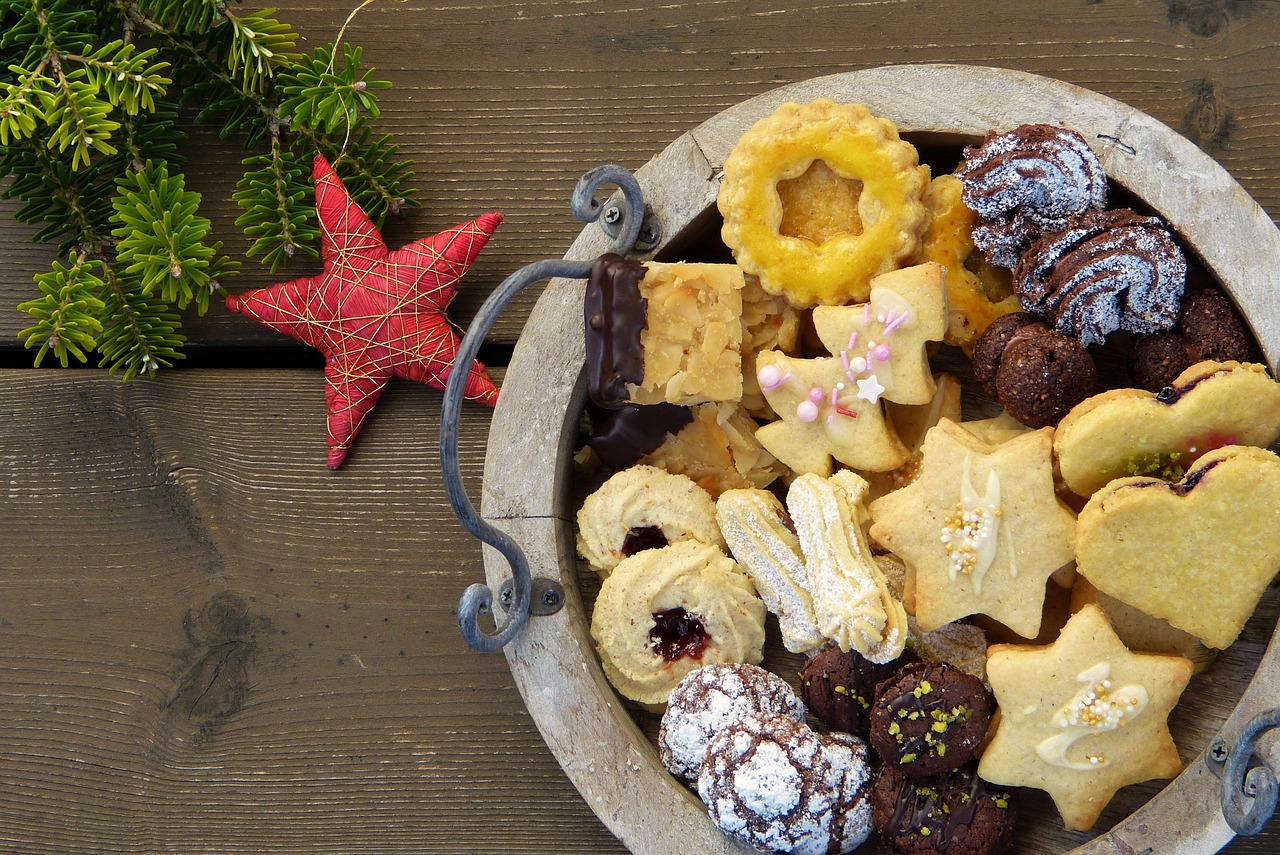
According to the last pictures that my mum sent, our family home was, as of last weekend, converted into a fully functional Christmas cookie factory with over 10 different varieties already baked, tinned, and available for consumption. Now is the time I wish I lived closer to my family 🙂 

That doesn’t mean that cookie manufacturing is completed yet. Unless my mum has “manufacured” at least 15 different varieties and more than 5kg, she’s not done. I assume, from previous experience, that it’ll take another 2 weeks before the Christmas cookie ‘production’ ceases, and all cookies will be neatly stacked in colourful cookie tins in our cellar. It always astounds me how long it takes to produce them, and how quickly my family and friends invited for “pre-Christmas coffees” eradicate the stock! 
When it’s time for me to fly home for Christmas, I get to look at some remaining crumbles at the bottom of the tins, at best. Just enough to stick my nose in, smell the delicious aroma, and dream of the day that they’ll keep some for me. Maybe. Next year…

So – what is the lesson here for me? 

If I want to enjoy some sweet Christmas treats, I’d be better making my own! 

1 ‘No-bake’ Christmas Rum balls 

Credit: Mrs Flury

Ingredients

for chocolate coating
  • 100gr dark chocolate (>70%)
  • 50gr vegan butter or coconut oil
  • 300gr dried out cake / stale cake left-overs 
  • 1 Tbsp cocoa powder 
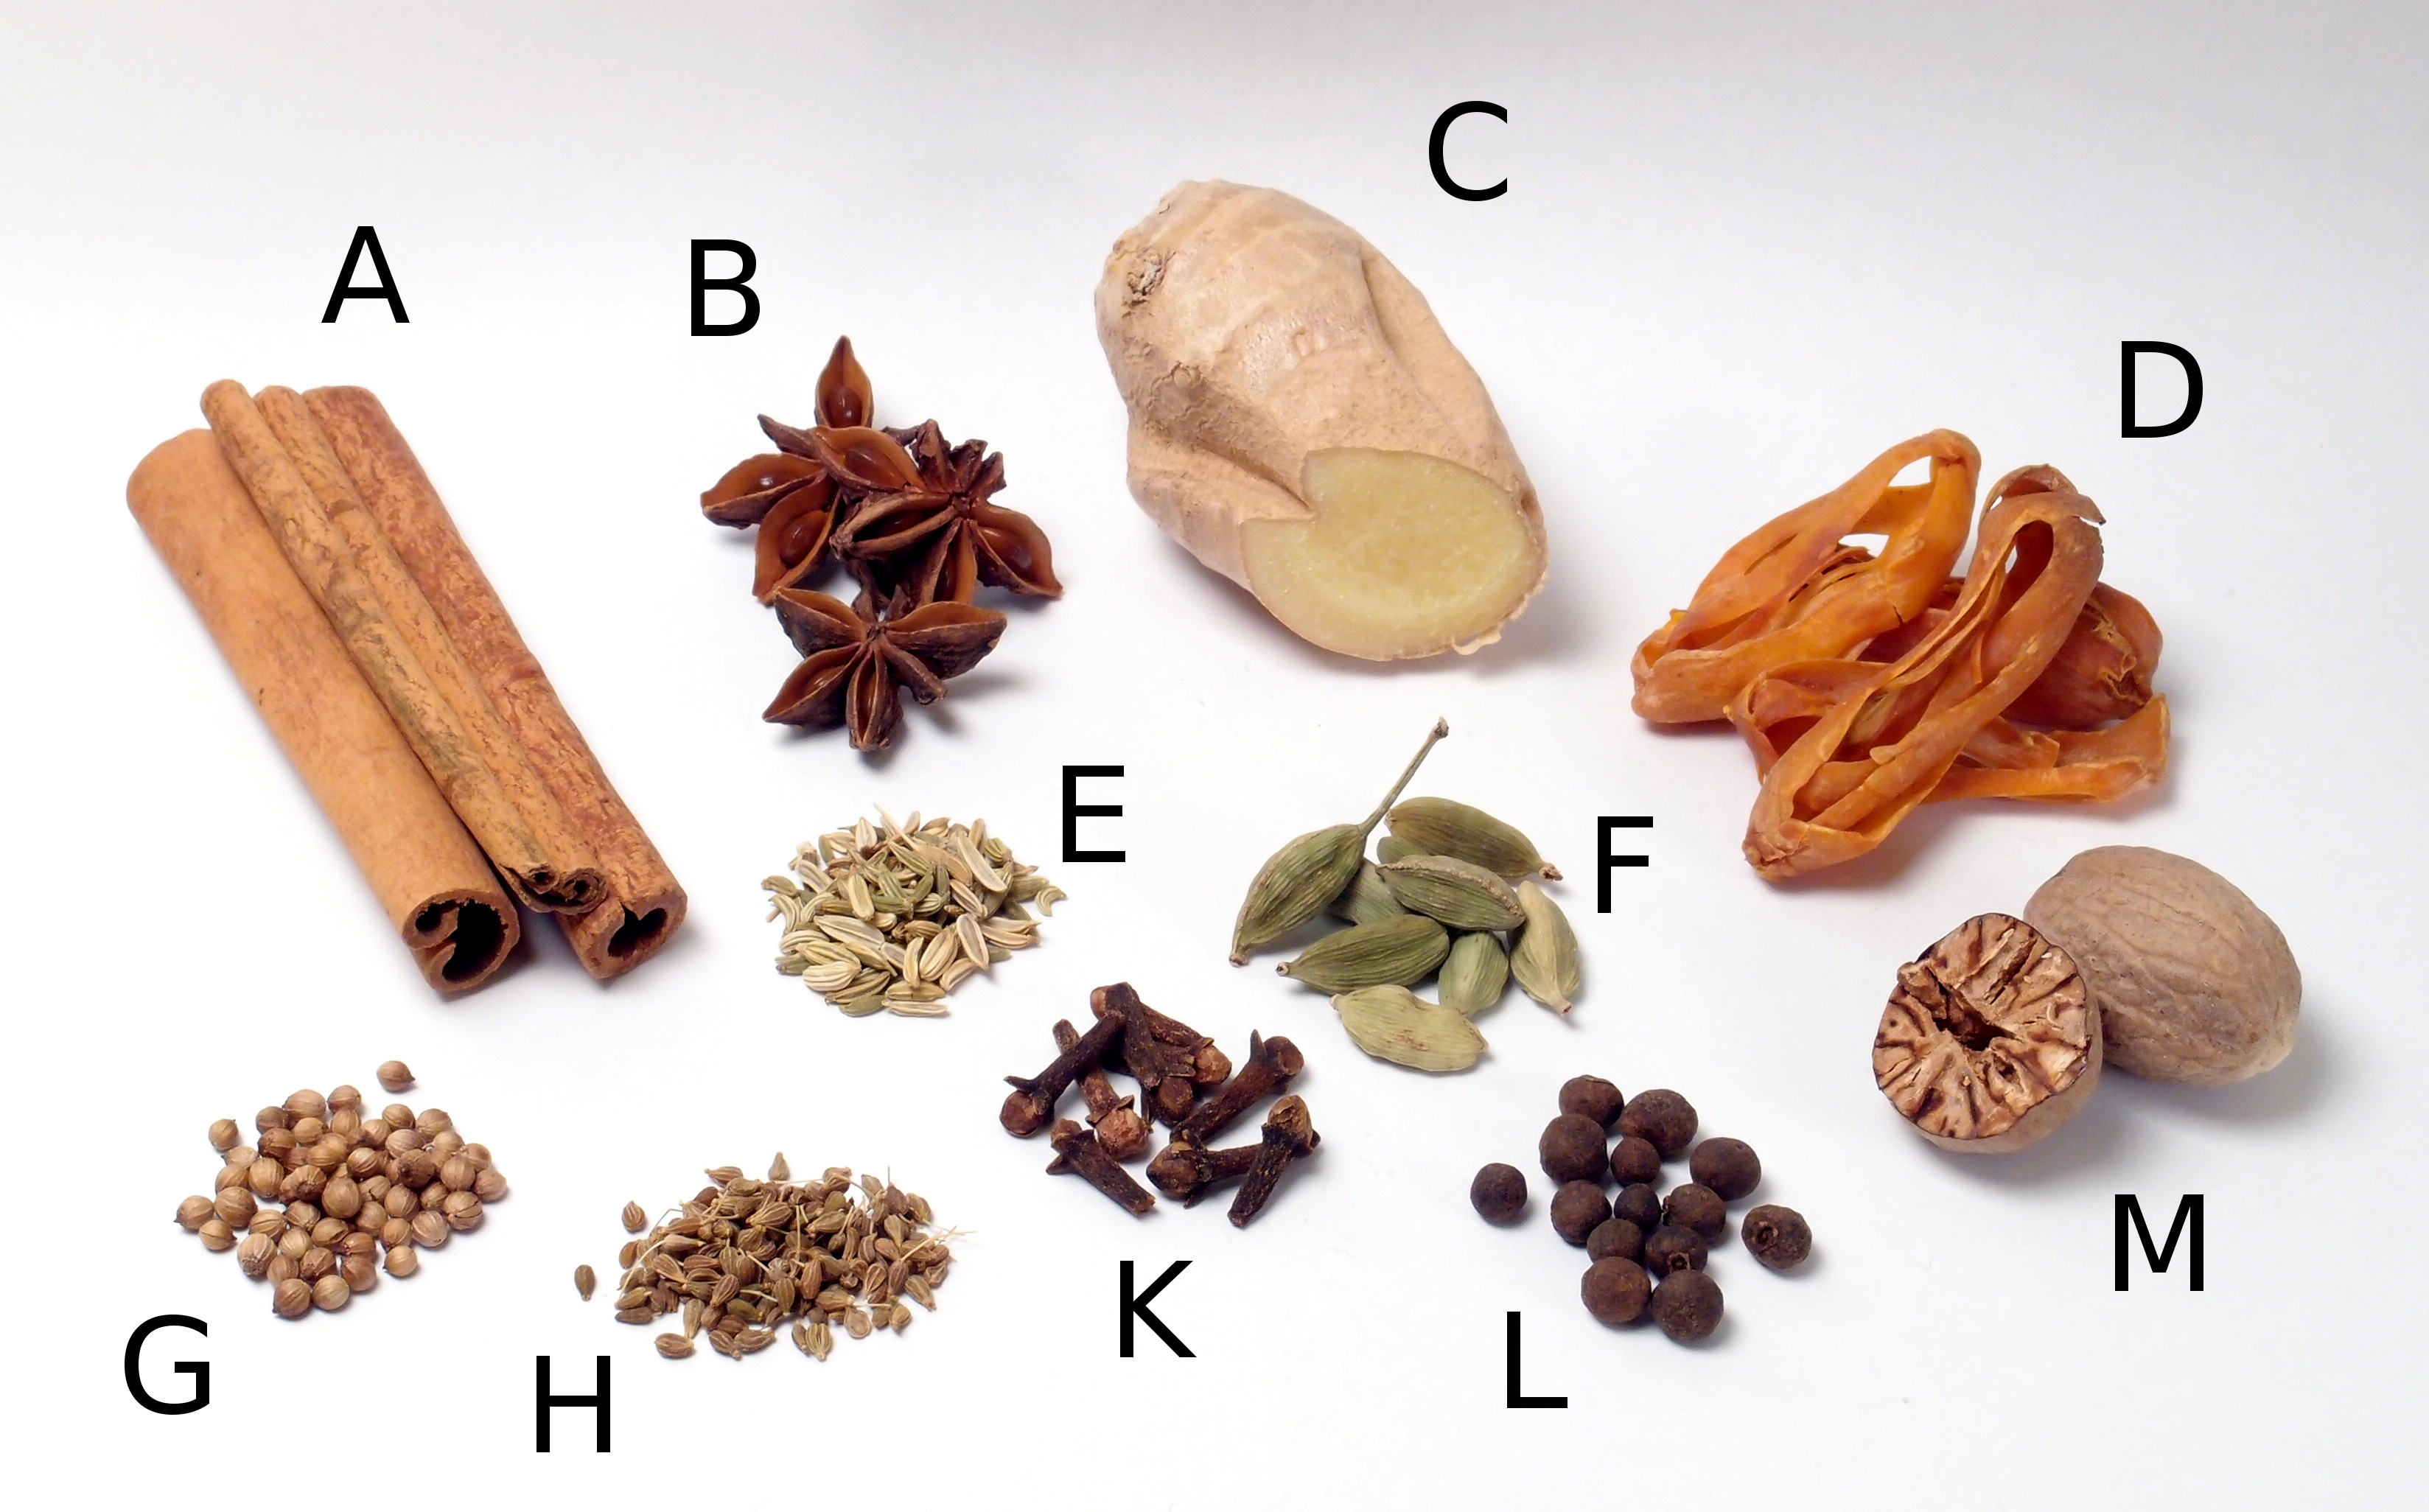
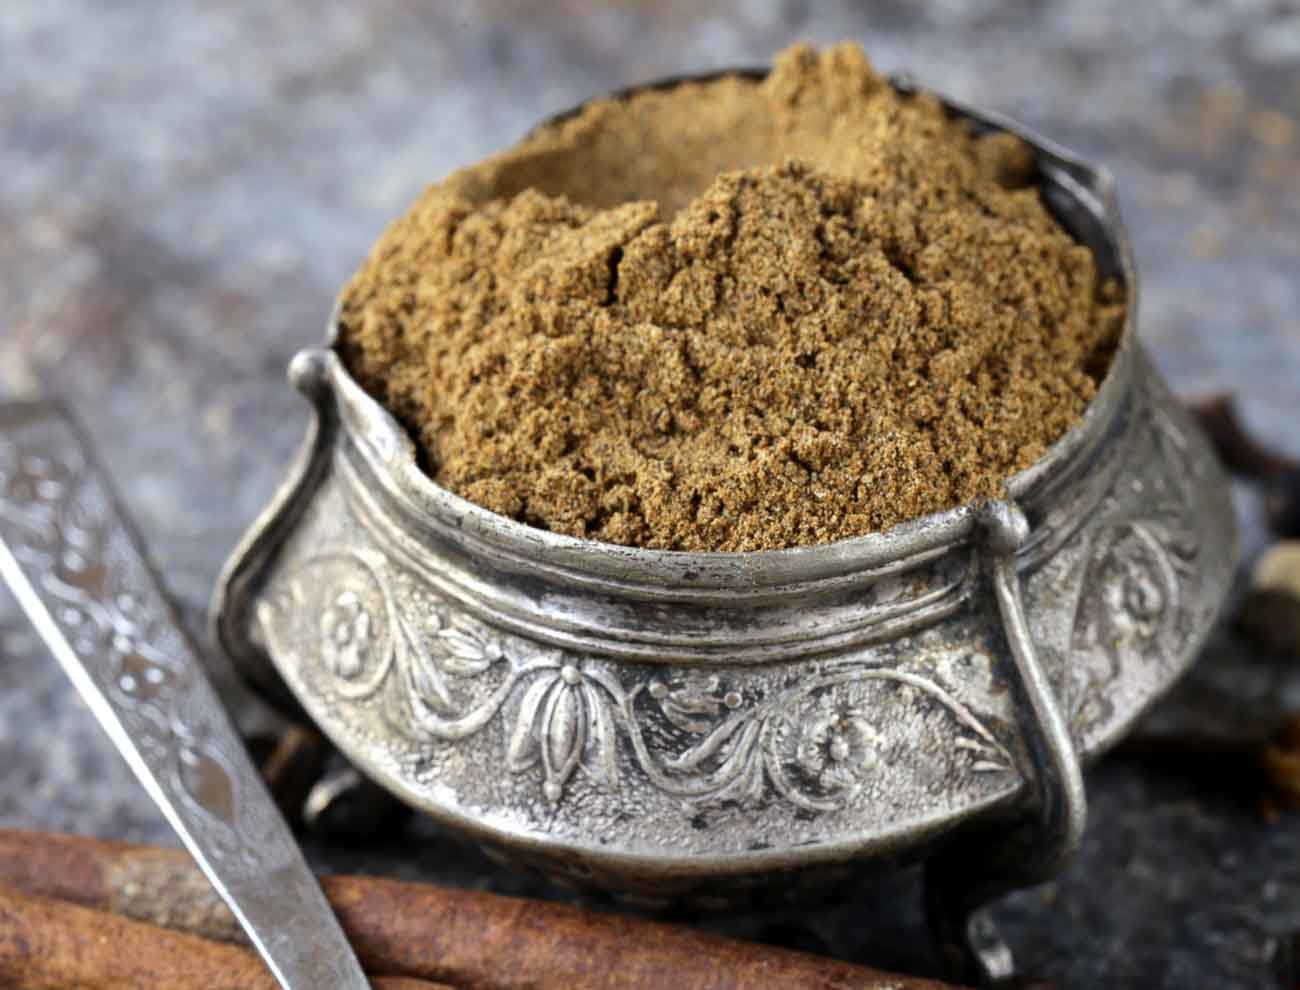
  • 1 tsp gingerbread spice (I made the mix myself, find the recipe here)
  • 3 Tbsp rum (if you won’t want to use alcohol, you can use rum aroma/flavouring, else, orange juice)
  • 80gr of white vegan chocolate for the chocolate coating, and some dried cranberries, or any other dried fruit you’d like to use to decorate

Preparation

  1. Chop the dark chocolate into small pieces and heat together with the vegan butter (or coconut oil) in a bowl hanging over a pot of hot water. 
  2. Set aside to allow cooling down a bit.
  3. Use your hands to crumble the stale cake left-overs into a separate bowl. Break down the crumbs as finely as you’d like to have them in the rum balls later. 
  4. Add the cocoa powder and gingerbread spice, and mix well.
  5. Now, add the melted chocolate into the cake crumb mix, and combine the two until you get a consistent mass. You can use a handheld mixer, if you prefer.
  6. Slowly add the rum, rum aroma/flavouring, or orage juice. 1 Tbsp at a. time.
  7. Form appr. 35 walnut sized balls from the mass and set them aside in a cool place (fridge) for about 30 minutes.
  1. For the chocolate coating: chop the white chocolate into small pieces and heat in a bowl hanging over a pot of hot water. Set aside to allow cooling down a bit to avoid burning yourself in the next step!
  2. Transfer the melted chocolate into a piping bag.  Or use af reezer bag, and cut off a tiny bit of one corner. Now you can decorate the rum balls and place the drid fruit on top of the chocolate coating. Your finished rum balls will look similar to the ones in the picture below!
  3. Place into fridge for at least 1hr until the chocolate sets. 
  4. Keep them in a cool place and allow them to come up to room temprerature 30 minutes before serving.
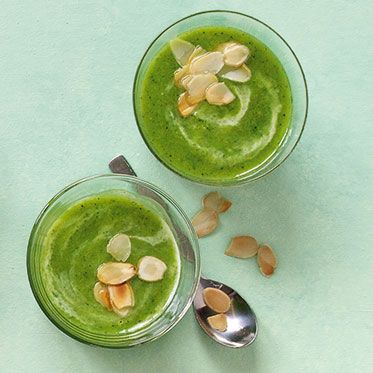
2 Cinnamon stars

That is without a doubt the most classical baked Christmas good you can imagine. Right up there with gingerbread and spiced biscuits ‘Spekulatius’. And who doesn’t like to star gaze around Christmas time? I’ll be focussing on Cinnamon stars for my personal stargazing event(s), considering that the UK cloud cover around this time of year doesn’t allow for anything else. 

So, get your star shaped cookie cutter ready!

Ingredients

For the star dough:

  • 200gr icing sugar
  • 2 Tbsp ground cinnamon
  • 8 Tbsp water
  • 1 Tbsp lemon juice
  • 150gr ground almonds
  • 200gr ground hazelnuts
  • 1 Tbsp freshly grated orange peel

For the star glazing 😉

Some icing sugar, ground cinammon, and water to get the right consistency to your liking.

Preparation

  1. Mix all star dough ingredients in a bowl antil well combined. You should obtain a relatively firm dough ball.  
  2. Roll out the dough to the desired thickness on a non-stick, cut-resistant liner. *Please see my note below!
  3. Cut out as many stars with your cookie cutter as your star dough allows you to. 
  4. Carefully transfer all stars onto a reusable cooking liner, or a greaseproof baking paper on a baking tray. Now, take the remaining dough, form a ball with it again, roll out, and repeat the process until you have used up all dough. Eat the rest – that is always an option 😉
  5. Set the baking tray with all stars aside de for 4hrs to dry out slightly at room temperature. 
  6. Shortly before the 4hrs are up, preheat the oven to 250°C.
  7. Place the baking tray and your beautiful stars into the oven and bake for 3-5 minutes only. You don’t want them to become too dry and brittle.
  8. Remove the stars from the oven once done, and allow them to cool down before putting on the icing.
  9. Mix the icing sugar with some cinnamon and a few drops of water at a time until you reach your preferred icing consitency.
  10. Transfer the icing onto your newly born stars with a pastry brush. Just Glaze away!  
  11. Once the icing has set, you can either place them into a cookie tin for later consumption, or you can invite all your friends to your cosmic event. Cinnamon stargazing from the comfort of your living room! You will note, as quickly as the stars come out, as quickly they are gone!

*Note: I recommend not rolling the dough out too thin, as you’ll find it difficult to pick up the cut out stars when transferring them onto the reusable cooking liner, or greaseproof baking paper. Unlike the real stars, which cannot break, these cinnamon ones can.  

Want more? OK, s’more it is!

3 UK S’mores cookies 

I discovered this United States & Canada traditional nighttime campfire treat just recently. Two month ago, in hot and sunny Miami to be precise. Not the surroundings you’d necessarily connect campfires with. Since it was 35°C outside, and we had lunch in an air-conditioned hotel room, no campfire was included. It was immediately clear that we’re having a keeper here. I thought, if they can serve it in a tropical climate, I could easily steel the recipe and import it to the UK. I loved s’mores!

In order to keep S’mores vegan but modulate the wide array of S’more recipes available, I decided to give them a UK Christmas twist. So UK S’more cookies it is!

Ingredients

Preparation

  1. Mix the chia seeds with water and set aside for at least 15 minutes. The mix will form a jelly-like consistency.
  2. Preheat oven to 175°C. Line large baking tray with a reusable cooking liner, or with greaseproof baking paper.
  3. Dry ingredients: Combine the flour, cornflour, baking soda, and salt in a large bowl. Then set aside.
  4. Wet ingredients: In a separate bowl, mix the butter or coconut oil, brown sugar, and granulated sugar until well combined. Add the ‘chia-jelly’, and vanilla. Stir to combine.
  5. Combine the dry and the wet ingredients in the larger bowl, and mix until you get a smooth dough. Stir in the chocolate chips, the mini marshmallows, and the crushed digestives.
  6. Form small walnut sized balls from the dough, and place them on the liner or baking paper. Place the tray in the oven and bake for 10-12 minutes, until golden brown.
  7. Once ready, remove tray from the oven and allow the cookies to cool down a bit. They’re delightful enjoyed warm though!
Credit: Sweet Paul

Do you want to receive all our plant-based recipes as soon as they’re “out of the oven”? Served warm? Please leave us your contact details and we’ll ensure that you’re the first to know!

Merry baking ’til then! 🙂

[wpforms id=”651″]

Do you crave any other Chrismas cookie and want us to post the veganized version of it? Which Christmas treat would you like to see here? 
Or would you like us to translate any of our recipes into German, Spanish, or Portuguese?
Please leave us your comment below. 

post

Gingerbread spice

It’s the time of the year where making fresh gingerbread spice comes in very handy, as I’ll use it in many of my winter cakes and cookies. 

Let’s not waste our precious time and get to it!

Ingredients

  • A  35gr ground cinnamon 
  • B 2gr ground star aniseed (optional)
  • C 2gr ginger powder
  • D 1gr ground mace
  • E 1gr ground fennel seeds (optional)
  • F 2gr ground green cardamom
  • G 2gr ground coriander
  • H 1gr ground aniseed (optional)
  • K  9gr ground cloves
  • L  2gr ground allspice
  • M 1gr gound nutmeg

Preparation – it doesn’t get easier than that!

  1. Place all ingredients in a small glass jar. Screw on the lid and shake and mix well.
  2. DONE!
post

Cavolo Nero, Butterbean & Orange Soup with Almonds

Credit: Abel & Cole

I previously spoke about the amazing health benefits of beans in my feijoada recipe; feel free to check it out! The health benefits, the recipe, or both 🙂
Since then I’ve incorporated black beans and kidney beans in my recipes. I think it’s time for butter beans. I’m aware though that people have mixed feelings about butter beans. Feel free to adapt to your liking with any other type of bean. Nutritional powerhouse beans – tick. Let us look at the next key ingredient: Kale!

Kale is amongst the most nutrient-dense foods per calorie on the planet! Hence, I always keep some type of kale in my fridge. It is loaded with Vitamin K, A and C, bursting with antioxidants, and a great source of sulforaphane.
I decided to give the original recipe a little twist, and prepare the soup with ‘Cavolo Nero’, black cabbage.

Finding a recipe that contains both beans and kale, seem like a winner! My soup is simmering on the stove, spreading a wonderful aroma. I don’t want to keep you from experiencing the same joy!

Ingredients

  • A few splashes of olive oil
  • 1 large onion, finely chopped
  • 1 potato, finely diced (peel if you want, else, scrub it well)
  • 1 carrot, finely diced (peel if you want, else, scrub it well)
  • 3 cloves of garlic, finely chopped
  • ½ red chilli, finely chopped (more or less, to taste)
  • 1 sprig of rosemary, finely chopped
  • A pinch of ground cinnamon
  • The juice and zest of 1 orange
  • 1 litre vegetable stock
  • 2 x 400g tins of butter beans, drained and rinsed
  • 4 large handfuls of cavolo nero, finely chopped (I prefer to to chop it with the stem, but you can remove it if you like)
  • A large handful of almonds, chopped
  • A pinch of chilli powder
  • A drizzle of agave nectar

Preparation

  1. Heat oil in a large saucepan.
  2. Once hot, add the diced onion, potato and carrot. Cook over a low heat until the onions are glossy and tender.
  3. Stir in the garlic, chilli, rosemary, cinnamon and orange juice and zest. Cook until the orange juice reduces to a sticky glaze.
  4. Add half the stock and the beans. Let it gently bubble until the potatoes and carrots are tender.
  5. Add the Cavolo Nero and mix. Cook for a moment, until it is a lush bright green.
  6. Whizz the soup with a blender or in a food processor until smooth, or serve chunky, adding stock as needed to reach the desired consistency.
  7. Season to taste. Add more orange or chilli if needed.
  8. Fry the chopped nuts in a little olive oil over a medium heat until just golden. Add a pinch of salt, a hint of chilli powder and a trickle of agave nectar, just enough to coat.
  9. Once the agave nectar has formed a sticky glaze, remove from the pan. Scatter nuts over each bowl of soup.

Enjoy this wintery soup and get warm and cosy!

Interested in more healthy recipes? Or do you want to know when we upload new recipes to this website? Please leave your details below, and we’ll email you.

[wpforms id=”651″]

Please let us know in the comments if you wish any recipe to be translated into Spanish, German, or Portuguese. Do you have a specific ingredient you’d like us to include into an upcoming recipe? Please let us know below.

post

Beetroot Hummus

Beetroot Hummus

Functional foods

I think it is safe to say that we all agree that diet high in fruit and vegetables has well-documented health benefits. “Eat more processed food and animal products” said not doctor ever. 
But have you heard of ‘functional foods’? I, until recently, hadn’t. Functional foods potentially have positive effects on health, which go beyond basic nutrition. They actually promote optimal health and help reduce the risk of disease. That doesn’t mean though you should replace your healthy balanced diet with functional foods exclusively, but including them regularly in your diet is probably a good idea.

The red beetroot, or “Beta vulgaris rubra” is such a functional food. Quite some studies have been conducted in the past decades to find out more about its application in health and disease. Beetroot is rich in bioactive compounds. As such, it is particulaly effective in targeting chronic inflammation. 

I talked about chronic inflammation as a precursor for obesity in my recent article about air pollution. I now wonder if people living in cities with high air pollution levels may want to include more beetroot and anti-inflammatory foods to balance the effects. 

Let us start with an all beloved dip: hummus. Or for reasons above, beetroot hummus.

Ingredients

  • 1 tin chickpeas, drained and rinsed
  • ¾ tsp salt
  • ½ tsp ground cumin
  • 1 small garlic clove, minced
  • 1 cup sliced beets (fresh or from a tin, as you prefer)
  • 1 Tbsp lemon juice
  • 1 Tbsp extra-virgin olive oil
  • optional: 2 Tbsp of catpured liquid from chickpeas (first add 1 Tbsp, if you prefer thinner consistency, add more)

Preparation

  1. Pour the liquid off, capturing half of it in a small bowl. Rinse the chickpeas shortly with water.
  2. Place all chickpeas in a food processor, adding the salt, cumin, garlic, and beets. Turn the processor on to break up the mixture.
  3. With the food processor running, pour in the lemon juice and olive oil, and let the processor run until the mixture is smooth. Optional: add some of the liquid from the chickpeas for a thinner consistency. 
  4. Serve with veggies of your choice. I love carrot sticks and celery sticks with it! It’s great in tortilla wraps, on sandwiches and crisp bread too.

If you like to get more ideas for plant-based breakfast, lunch, dinner, and snack recipes please leave us your details below. We will informyou as soon as we share a new post on this website.

Eat healty – be happy 🙂

[wpforms id=”651″]

post

Overnight Chia-Oat pudding

Chia pudding topped with berries, overnight chia oat pudding

The early bird catches the worm – and the late one the Chia pud!

I am not a morning person, no matter how often I try to trick my mind into it. My body just doesn’t follow. Maybe it’s time to embrace the ‘late night me’, shedding my sense of guilt once and for all. Science long suggests that night owl tendencies are hard-wired into our genes. Apparently it is the gene CRY1 that is to blame for my circadian clock running behind. That means I wake up later than normal, and go to bed later than normal. 
From the quantity of overnight oats recipes spreading in the internet, I can only assume that I am not the only one with CRY1. 

It was for all of us that overnight oats were invented. I assume that, at least. 
I’ll share my favourite recipe with you here. I make it almost every other night, pop it into my fridge – et voilà  – breakfast is sorted in 5 minutes.

All you need is

  • A medium size mason jar with a lid
  • 150gr dairy-free joghurt
  • 2 Tbsp chia seeds
  • 2 Tbsp oats
  • 3 Tbsp dairy-free milk
  • 1 Tbsp nut butter
  • 1 tsp agave nectar
  • 4 Tbsp frozen berries
  • 1 nectarine, sliced

Then…

There are two different ways to prepare this delicious protein rich breakfast that’ll leave your satisfied until lunch time.

  1. Mix the yoghurt, agave nectar, chia seeds, and oats, nut butter, and milk in the mason jar. Top off with frozen berries, put on the lid, and place in the fridge over night. Add nectarine slices the next morning.
  2. Mix the yoghurt, agave nectar, chia seeds, and oats, milk, and 2 Tbsp of frozen berries in the mason jar. Top off with nut butter and 2 Tbsp frozen berries, and place in the fridge over night. Add nectarine slices the next morning.

Did this leave you hungry for more? Would you like us to send you our plant-based recipes per email as soon as we share them on our site? 
Feel free to sign up!

[wpforms id=”651″]

Let me know in the comments below or our contact form if you’re interested to send you translations of the recipes into German, Spanish, or Portuguese. 

post

Mandarin Chia Muffins

Mandarine Chia Muffins

Winter temptation…

Every now and then I feel like I need a sweet afternoon treat. Funny though, I only feel that way in winter as it is getting colder. I am perfectly fine to go all summer without “sinning”, but as soon as temperatures drop I cannot help but wanting to enduldge in some sweet baked goods.Pastries are pretty much off the menu since becoming plant-based, at least when I’m ‘out and about’. They’re mostly sugar-laden anyway so I prefer to come up with something more wholesome. 

Seasonal & Healthy 

I sometimes wonder if I am a control freak because it gives me an immense sense of satisfaction to prepare my food from scratch back home. I have full control over what goes in and what stays out. 

This muffin recipe intrigued my directly: mandarines and chia seeds! Mandarines are seasonal, now that the temperature drops and we’re heading towards the festive season. I catch myself so many times these days closing my eyes and allow my olfactory sense to take in the sweet yet tangy aroma when somebody next to me on the tube or bus peels a mandarine.

Well, and chia seeds? They are my every day glorious omega-3 fatty acids essential, and whenever I see a recipe with them, they attract my immediate attention. Especially, but not only, in winter. Why? Do these symptoms sound familiar to you as the colder weather and shorter days set in? Fatigue, dry skin, mood swings, depression and poor circulation? These symptoms generally worsen during the long cold winter months but can as well be caused by deficiencies in these essential fatty acids. So I’d rather eat some muffins to prevent that 😉

Enough said, let’s get started: ready, steady, mix and bake!

Ingredients

  • 50gr flour (Type 1050)
  • 75gr flour (Type 550)
  • 25gr spelt flour 
  • 1/2 tsp baking soda
  • 3/4 tsp baking powder
  • 5gr chia seeds
  • 75gr cane sugar
  • 125gr dairy-free yoghurt
  • 30ml dairy-free milk
  • 25gr agave nectar
  • 30ml oil
  • 1/2 ml mandarin oil / orange oil 
  • some grated peel and juice from 2 mandarines

Preparation

  1. Pre-heat the oven to 175C.
  2. Grease a muffin form or place paper muffin moulds into the muffin form for 6 muffins.
  3. Dry ingredients: Mix the flours, baking soda, baking powder, chia seeds and sugar in a mixing bowl.
  4. Wet ingredients: In a seperate mixing bowl, mix the yoghurt, milk, agave nectar, mandarin oil, and oil. Then slowly add the mandarin juice and the peel.
  5. Add the wet ingredients to the dry ingredients and fold them in with a spoon, and mix until you get a smooth dough.
  6. Add the dough to the muffin moulds, filling them only to 3/4.
  7. Place the muffin form into the oven for appr. 25 minutes, and check with a wooden stick if ready. The muffins are ready if the wooden stick comes out dry (there’s no wet dough sticking to it). 
  8. When ready, remove from the oven and allow to cool down before serving
Enjoy!!

Never want to miss another delicious plant-based recipe again? Or want us to email the recipes to you?
Please leave me your details below, and we will send you updates as soon as we share another post on this website.

Let me know in the comments below or our contact form if you’re interested to send you translations of the recipes into German, Spanish, or Portuguese!

[wpforms id=”651″]

post

Broccoli creme soup

I love soups as it gets colder outside! This one is an all-time fave of mine, and it seems great for the next chilly days that are forecasted. Not only will it warm you from the inside out, but it’s super healthy too.

Broccoli is another healthy member of the cruciferous vegetable family, like cabbage, kale, cauliflower, Brussels sprouts, bok choi and many more. If you’ve seen my past recipes you may have noticed that I cook with these veggies on a very regular basis. Why? All cruciferous veggies have a wonderful component, which makes them so incredibly beneficial for our health. I have shared some of these benefits in my stir-fry ginger cabbage recipe.

Now, did you know that you can make broccoli even healthier by chopping it into small pieces before cooking it? Apparently the finer you chop it, the better! Chopping the broccoli activates the enzyme myrosinase, which in turn causes sulforaphane to become available for absorption. To allow the sulfurophane to ‘develop’ it’s important to let is ‘rest’ for at least to 30 minutes before cooking it. ‘Resting’ times between 30 – 90 minutes are most beneficial to maximise sulforaphane absorption according to some research.
It was last year that I came across this interesting fact and now it became second nature for me when preparing any dish with broccoli:

  1. chop finely
  2. wait for at least 30 minutes 

With this information ‘out of the way’ let’s get to our creamy soup!

Ingredients

  • 500gr broccoli
  • 1 small onion
  • 1 Tbsp oil
  • 1/2 Tbsp vegan butter/margarine
  • 1 Tbsp flour
  • 1 1/2 Tbsp white wine
  • 500ml vegetable stock
  • 100ml vegan cream (soya/oat)
  • 1/2 tsp salt
  • 2 Tbsp almond flakes or chopped almonds
  • some pepper and nutmeg to taste

Preparation

  1. Wash broccoli and chop finely
  2. Set aside for at least 30 mins
  3. Go and enjoy something else in the meantime like reading, chatting to a friend, or taking a power nap 😉
  4. Come back and chop the onion finely. Heat some oil in a deep pan and add the chopped onion, and glaze at medium heat for 1-3 minutes. 
  5. Then add the vegan butter/margarine and the finely chopped broccoli and dust the flour over the mix. Gently stir and cook for 2 minutes.
  6. Add the white wine, the vegetable stock, and the cream and cook everything for 5-10 minutes, until the broccoli is cooked.
  7. Once cooked, turn off the heat and carefully blend all ingredients with a hand blender. Then season with salt, pepper, and nutmeg.
  8. Serve in bowl sprinkling the almond flakes / chopped almonds over the soup.

Enjoy and stay warm!

post

Dal “Makhani”

There is no point in trying to hide my obsession with Indian food. It’s just too good!

It’s all about connection

Just two nights ago I met an absolutely lovely group of people, all of them, but one, strangers to me. I could not have forseen that 3 hours later we’re all invited to an after-midnight dinner. To a house of a person that I didn’t even know a couple of hours earlier… That’s unheard of these days! 
It wasn’t Indian food that was served yet I realised once more how many meaningful connections are made at a dinner table, over a fine meal and a glass of wine. Good home-made food just has this magic to connect people of all different walks and talks of life, and for that reason alone I love it!

So why did I pick this Punjabi dish for today’s World Vegan Month contribution? Amongst the friendly and open hearted group of people was a sweet young lady from Bombay with family ties to the Punjab and Assam region. We were all dazzled by the stories she shared with us that night. We spoke about Assam tea plantations and Punjabi food, and my mind travelled to these far places whilst she passionately narrated her family stories. 

Despite the fact that we stayed late that night I made a promise to myself. To prepare a Punjabi dish as soon as I’d get the opportunity. I now have a very different relation to Punjabi dishes, thinking of this lovely night and unique connections that were made. It just makes me smile 🙂 

Beans are back

Beans are an absolute staple in my kitchen as they are super healthy and nutritious. Oh, and they’re featuring in so many delicious vegan recipes. I always stock up on black beans, butter beans, kidney beans, and mung beans.  I’ve already hyped black beans when sharing my favourite vegan feijoada recipe, so please check it out if you want to learn more about health benefits of beans. 
This dal uses kidney beans, not black beans, but those fair really well on nutritional value too!

Good things take time

This creamy and rich dal takes some time in preparation. More time that I’d usually give myself for cooking – BUT it’s totally worth it. There is a direct correlation between my growing anticipation and appetite and the time it takes to simmer. I love the power of a mouthwatering aroma spreading through your entire apartment!

This said, to not use up any more of your time – here’s the link to another popular veganized dish I cannot imagine living without. A mouthwatering vegan Dal “Makhani”.

A good home-made dish deserves a good home-made spice mix to further enhance the sensational experience for your taste buds. Please check out my recipe for the Punjabi Garam Masala

 Be ready to be dazzled!

post

Punjabi Garam Masala

When it comes to cooking exotic dishes with fragrant herbs and spices I like to prepare the spice mixes from scratch. A freshly toasted and ground spice mix bursts in intensity of flavour, and is a blessing to every dish!

For my veganized Punjabi Dal Makhani, I need my Punjabi Garam Masala. Shall we?

Ingredients

  • 1 Tbsp coriander seeds
  • 2 tsp cumin seeds
  • 1 tsp whole cloves
  • 1/2 tsp black pepper corns
  • 3 bay leaves, broken up
  • 3 cinnamon sticks or cassia bark, broken up

Now the prep

  1. Toast all ingredients in a small pan on medium heat for 2-3 minutes unil they’re golden and fragrant. Don’t overcook the ingredients or allow the mix to get brown as it can spoil the aroma of the finished spice mix. If in doubt, undercook. 
  2. Take the pan off the heat and allow the toasted ingredients to cool down before tansferring them into a grinder / spice blender. 
  3. Grind all cooled down ingredients in the grinder / spice blender. If necessary, turn off the grinder / blender every few seconds and check for remaining larger pieces, shake the mix, and continue grinding until you will have a fine powder. 
  4. Transfer into small glass container(s) with a tight fitting lid, and store in a dark cool place. It’s most aromatic within the first 3-4 weeks but will last longer if needed. 
post

Mini Pizza Snacks

Do you sometimes get this Pizza craving? Just for a bite or two? Not the whole Pizza? I know, I do. Don’t get me wrong, I LOVE Pizza and can eat the whole thing, but sometimes it’s just that little bite that I need. 

One of my favourite vegan bloggers luckily came up with a solution to that. Anja once more shows how creative the plant-based cuisine can be, and moreover, demonstrates that we don’t need to cut out on all beloved comfort foods. 

My mouth is watering already, and since it only takes about 20 minutes to get some mini Pizza snacks on the table – I know what I’ll do now 🙂

Here’s to you too!! Delicious Mini Pizza Snacks – enjoy!

Credit: itsPotluck